There are various hosted continuous integration services out there that you can use for your Node.js projects, from Travis CI to drone.io and many others. If you feel adventurous or you are always fascinated by a DIY solution (for whatever reasons), it is apparently quite easy to setup your own CI system quickly using Docker and TeamCity.
 As an easy-to-use continuous integration system, TeamCity offers two free solutions for you: Professional Server license for up to 20 build configurations or Open Source license for your open-source projects. This is usually sufficient to get you started. Also, per the usual server agent architecture, we will run TeamCity server and agent in two separate containers. This is very similar to my previous blog post on TeamCity installation using Docker, with a minor tweak.
First, you need a machine for the server. This could be a physical machine, a virtual machine, or even a VPS. For a hassle-free setup, sign up for either Vultr or Digital Ocean (note: my affiliate links). Make sure you evaluate the system requirements to run the server (e.g. 2 cores and 2 GB RAM will be ideal).
On this machine, Docker must be installed properly. A useful quick test:
sudo docker run -it ariya/centos7-oracle-jre7 cat /etc/redhat-release
should show something like:
CentOS Linux release 7.0.1406 (Core)
Once Docker is there, starting TeamCity server is as easy as:
sudo docker run -dt --name teamcity_server -p 8111:8111 \
  ariya/centos7-teamcity-server
This is using a prepared container I have created called ariya/centos7-teamcity-server. Note that the container supports volume mapping of /data/teamcity. You definitely need to do this if you want to persist your TeamCity projects and other settings. Here is a fancier way to invoke the server where the data is stored on the host system under /var/data/teamcity and with automatic restart in case the server dies.
sudo docker run -dt --name teamcity_server --restart=always -p 8111:8111
  -v /var/data/teamcity:/data/teamcity
  ariya/centos7-teamcity-server
Also, if you are using a firewall, make sure to accept connections on port 8111. With iptables:
sudo iptables -A INPUT -p tcp --dport 8111 -j ACCEPT
sudo service iptables save
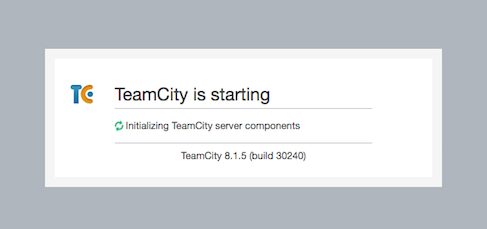
Once the server is running, visit the site (on port 8111) using your web browser. This allows you to initialize and configure TeamCity server. In a minute or two, it should be ready to use.
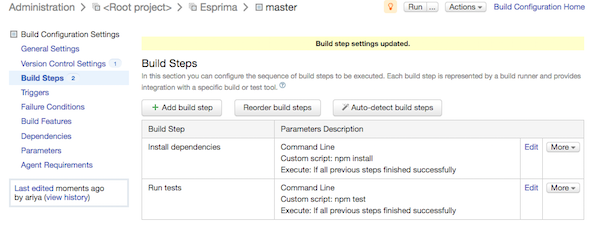
You can start creating your CI project, refer to the excellent TeamCity documentation for details. For the build process itself, it is quite common to invoke npm twice, first to install the dependencies and then to run the tests. This is illustrated in the following screenshot.
While it is sufficient to use the command-line runner to invoke e.g. npm test, if you want to be a bit more sophisticated, you can use a customized runner such TeamCity.Node.
Of course, the project can not be executed right now because the server does not have any connecting build agents yet. Starting an agent is also extremely straightforward as I already prepared another container for that, ariya/centos7-teamcity-agent-nodejs. This container is already equipped with Node.js 0.10 and npm 1.3.
sudo docker run -e TEAMCITY_SERVER=http://$TEAMCITY_HOST:8111 -dt -p 9090:9090 \
  ariya/centos7-teamcity-agent-nodejs
In the above example, you need to supply the IP address of your server with the environment variable TEAMCITY_HOST. Again, the firewall needs to accept connections on port 9090.
It is of course possible to run this agent on the same host as the server, particularly if you have a beefy machine. In this case, you need to use Docker IP address:
export TEAMCITY_HOST=$(sudo docker inspect --format \
  '{{ .NetworkSettings.IPAddress }}' teamcity_server)
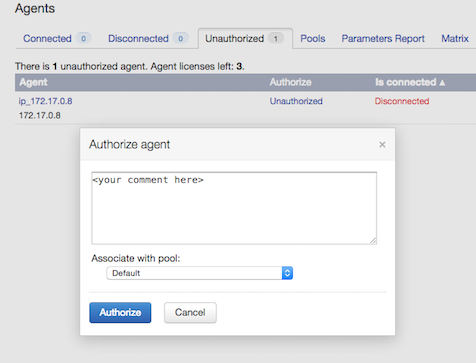
It takes a while for the agent to register itself with the server. However, it does not mean that the agent is immediately available. First, you need to authorize it so that the server will trust the agent and start dispatching the build tasks to the said agent. After that, you can start running your project.
Thanks to Docker, everything could be done in 10 minutes or less. Have fun with all the tests!


