TeamCity from JetBrains is an easy-to-use and powerful continuous integration system. It is a commercial product, but there is a special zero-cost license for small projects and FOSS applications. While installing TeamCity is relatively easy, its setup is further simplified via the use of Docker.
 Like many other state-of-art continuous integration systems, TeamCity adopts the concept of build server and build agent. The server is responsible for the adminstration and build configurations. The actual build itself (compilation, packaging, deployment, etc) is carried out by one or more build agents. With this approach, it is also easy to provision the agent automatically so that the entire setup requires very little manual tweaks.
TeamCity Server only requires Java. The installation is rather straightforward. With Docker, this is even easier. I have prepared a special container for this, ariya/centos6-teamcity-server. The base system for the container is ariya/centos6-oracle-jre7, a CentOS 6.5 system running the official Oracle Java 7 (to be more precise, JRE 1.7.0_65-b17 at the time of this writing).
Assuming you have a system (VPS such as Linode or DigitalOcean, Amazon EC2 instance, a virtual machine, a real box) that already has Docker installed, setting up a TeamCity Server is as easy as running the following commands. Note that if you are on OS X, use boot2docker if you just want to experiment with this setup (see my previous blog post Docker on OS X for more details).
docker run -dt -name teamcity_server -p 8111:8111 ariya/centos6-teamcity-server
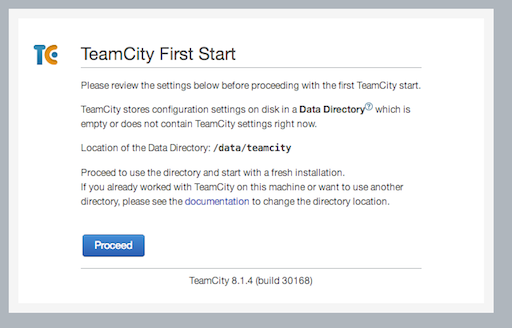
Give it a few minutes or so, now open the box’s address at port 8111 to start the web configuration of TeamCity Server (read the official TeamCity documentation for more details), as shown in the following screenshot. If your host system is using iptables, make sure to accept connections on port 8111. Note that TeamCity data will be stored in the special location /data/teamcity. This is a standard Docker volume, it is useful to allow easy mounting, back-up, or future upgrade.
Once the server is configured, it is time assign a build agent to this server (otherwise, nothing can be built). Again, we will spawn a build agent easily using Docker by running the container named ariya/centos6-teamcity-agent. For the agent to work, we need to specify the server. Here is how you would run it:
docker run -e TEAMCITY_SERVER=http://buildserver:8111 \
    -dt -p 9090:9090 ariya/centos6-teamcity-agent
If you run this in the same host which is running the server container, you need to link them together:
docker run -e TEAMCITY_SERVER=http://teamcity_server:8111 \
    --link teamcity_server:teamcity_server -dt ariya/centos6-teamcity-agent
Update: the above link does not work, due to the lack of bidirectional connection between two containers. You need to obtain the internal IP address instead, refer to the latest blog post on TeamCity for details.
The environment variable TEAMCITY_SERVER is mandatory, it needs to point to the location of the instance of TeamCity server you started in the previous step. Once you run the container, it will contact the specified server, download the agent ZIP file, and set it up. Wait a few minutes since the build agent usually updates itself after the first contact to the server. If everything works correctly, you should see a new agent appearing on the Agents tab on your TeamCity server web interface. Authorize the agent and now it should be ready to take any build job!
If there is a problem launching the agent (docker ps) does not show the container running, try to run it again but this time with the option -it (interactive terminal) instead of -dt. This will dump some additional debugging message which can be helpful to assist troubleshooting.
Note that this agent container is also based on CentOS 6 with Java 7. Usually this is not enough as you may need other dependencies (different SDKs, compilers, libraries, etc). Ideally those dependencies should be resolved automatically, either by basing the container on a different system or by setting up the right automatic provisiniong. Refer to my previous blog post Build Agent: Template vs Provisioning for a more detailed overview.
Still have an excuse not to do continuous integration? I don’t think so!
